Search This Blog

Thursday, June 17, 2010

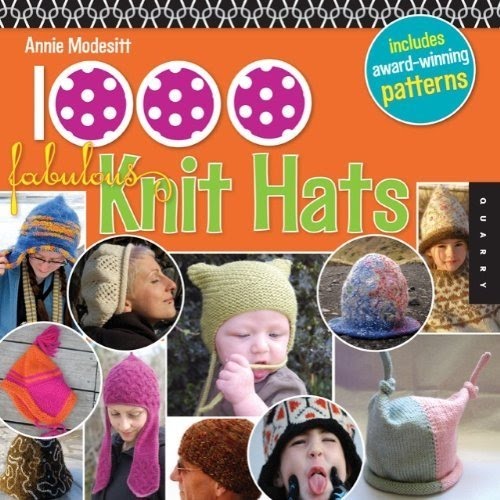
1000 Fabulous Knit Hats .... and one of my designs is in it!

Carousel Beret! My hat design that is in the book!

Dear Contributor:
Congratulations! Quayside Publishing’s new book 1000 Fabulous Knit Hats by Annie Modesitt in which your work appears has arrived at our warehouse.

YIPPEE! The book has finally hit the bookstore shelves! I just got my email 
(first line above) that the book is ready for purchase! As a contributor I am able to purchase at 55% off... whoo hoo, and as a courtesy to their contributors I can purchase any other books from Rockport Publishers, Quarry Books, Creative Publishing International, Fair Winds Press, Walter Foster Publications, Voyageur and Quiver at a 30% off discount. So I am sure I'll be seeing what other books might tickle my fancy.

I am so tickled PINK to have one of my hat designs (Carousel Beret) featured in this book by Annie Modesitt! Look at this screen shot from a page peek on Amazon at the back naming the contributors! THATS ME!

I have ordered 4 copies and can't wait to see it in person. I feel honored to have one of my designs along side other designers who are way more talented than me!

You can find the link below to purchase your copy!


" Have a blessed day!"

Tuesday, June 1, 2010

First Knitted FO for 2010

Pretty in Pink

When I went to upload my photos for this project to Flickr I was surprised that this was my first knitted FO for 2010! Are you kidding? It's June and I am just now finishing a knitting project? Wow! I have been doing some crochet and I have been busy crafting more with my Cricut these days, but I didn't realize that I hadn't been knitting. 
I made this for one of my husbands employees who is having a girl in August. They are giving her a baby shower mid June, so I knew I needed to knit fast. I forgot how much fun these little BSJ's (Baby Surprise Jacket) were to knit. I did add a 2x2 ribbing to the sleeves and added a crochet picot edge around the front and lower back edge, neckline and sleeves. I also used an applied i-cord bind off. Another thing I did was to knit an eyelet row and then run an i-cord through it. It turned out very nice.
ButtonsSleeve I-cord
Ravelry details here...

" Have a blessed day!"

Thursday, May 6, 2010

My gift to Jennifer and Sean

I can now share the secret project that I was working on the end of April. I crocheted this photo of my daughter Jennifer and her soon to be husband Sean. I made this as a wedding gift to the both of them and gave it to my daughter at her bridal shower this past Saturday.

It took me 2 weeks to complete it from start to finish. It ended up being 32" by 32" and had 107 stitches per row and had 125 rows total. The pattern was 25 pages long with 3 columns of instructions on each page. 

This was a CBN (Crochet by Numbers) pattern designed by Todd Paschall. You send him a photo and he turns it into a pattern for you for a $30 donation. Here is his website...
 He also has a group on Ravelry and you can find that here...
 
This was my first CBN pattern and although it's a lot of work to make one of these, it is very rewarding as the result is awesome! I know that I will be making more of these.

So if you would like to give this a try email Todd along with  the photo you'd like to use 
and tell him Connie sent you!

" Have a blessed day!"

Tuesday, February 16, 2010

An invitation to my new Scrapin' blog....

 
I have a new blog where I share my love of scrapbooking and cutting with my BugIt.
I'd love for you to stop by and visit. I'll be sharing my MTC files and projects there from now on...so if you
want to keep up with me, please follow me at Cut by Connie!


" Have a blessed day!

Sunday, February 14, 2010

Make the Cut

Remember that the MTC SALE price of an extra 25% off ends this coming Tuesday, February 16th! You'll never see this great of a discount again! Purchase using my link in the right sidebar, or you can download a demo to try before you buy!

If you cut with a BugIt or any other cutting machine, you NEED this program! Never purchase another BugIt cartridge! Cut anything and use any font from your pc....unlimited possibilities!

Wednesday, February 10, 2010

Anniversary Explosion Box

I am having such a great time using my MTC (Make the Cut) and my Cricut for cutting and designing Word Books and these Explosion Boxes. This one is for a couple in our SS class as their Wedding Anniversary is this coming Sunday. The husband invited our entire class to a surprise lunch after church. He wants to surprise his wife. He said no gifts, but we can bring cards, so this is my version of a card. LOL I feel pretty safe that she won't see this, as I don't think she even knows about my blog and she isn't on FB.

I designed these to be cut with MTC so you don't have to cut out the box by hand. You can find all of those files here: EBox Files You'll notice that I turned each layer just enough so that it still fits on the underneath layer. I thought this made for a prettier open look. I decorated some, but also left places for the recipient to decorate! The flower petals I took from another box I am working on but haven't finished yet.

I also added a puzzle! I found that svg here on the web. I first cut the puzzle, then I left it on the mat, changed my blade for a cricut marker before I cut it again. I left the puzzle piece on my mat and made it not visible so it wouldn't cut. Then I dragged the dove picture on top and sized it the size of the puzzle then I re-cut. This drew the dove picture right on top of the puzzle. I colored it while still on the mat, then carefully removed all of the between tid bits before removing them from the mat. I then put them in a pocket on one of the box flaps. I printed out a small pic of the completed puzzle for the recipient so they know what they are putting together...LOL

I also added tiny white flowers to the center which are glued to long thin pieces of plastic so they float around in the middle. I just cut thin strips of clear plastic which I save from the backs of clear stamps, deco parts and other scrap book supplies that have that clear backing to hold the parts. Bend the other end slightly and glue to the bottom underneath the edge somewhere. They are really neat because they bounce around when the box moves.

I hope this inspires you to create your own explosion box!


" Have a blessed day!"