First let me warn you that this is a long post and there are a lot of photos and links!!!

UPDATE AT END OF POST!!!
I've recently been inspired by the huge stitched throws and blankets I've seen. I saw the first one on Pinterest and that sparked my interest. Those were knitted using a fiber from Loopy Mango called Big Loop Merino. (photo above) To knit a nice size throw you'd need a minimum of 2 of those skeins and they are $198.00 per skein!!! Then there is the matter of the huge knitting needles needed to knit with that super bulky yarn and finding a nice pattern! So, for the next few days I scoured the web trying to get as much information as I could and to see if I could use regular bulky yarn.
There are a few videos on YouTube showing ladies knitting them and there are a few patterns on Ravelry. There's a couple of ladies selling the throws custom-made on Etsy and they are going for upwards of $500.00 Which sounds about right after the cost of the fiber and then the time spent knitting one. Here's some info I found...
THE FIBER:
I found this roving yarn on Etsy for $39.00 a skein. However, you would need 6 or more skeins. Also, I didn't think I'd like using the roving (un-spun wool) to knit with as the throw would shed! Not something you want in a throw you want to cuddle up on the couch in. I don't think that the Big Loop Merino would shed as much but there again, very pricey. There are a few other shops on Etsy selling this type of fiber, just search for big stitch yarns.
My choice was to use Lion Brand Wool Ease Thick and Quick. My first try using size 50 circulars was ok, but just not as chunky as I wanted. I'm working on my second throw now and am using 3 strands of Loops and Threads Charisma. I'm also in the process of using Caron One Pound yarn holding 3 strands together and chaining with a size Q hook to make my chunky yarn for my 3rd attempt at a big stitch throw. This is what the pattern designer suggested and so that is what I'm doing. That pattern is called "Lost in You". It's a lot of work but I hope the result will be worth it.
THE HUGE KNITTING NEEDLES:
So, I decided to purchase a pair of size 50 circulars and hold 2 or 3 strands of regular bulky yarn together and see what I thought. Although is wasn't hard using the circulars it was a bit aggravating pushing the stitches back up onto the needle tips from the cord. The stitches would close up a bit on the cord and I'd have to really push and tug to get them back on the wooden needle tips.
So, for my 2nd throw I would need straight size 50 knitting needles. I purchased 2 1” diameter dowels that were 36” in length at Michaels. I purchased 2 little wooden “clay look” pots for the ends. My husband cut both dowels 24” long which left me with 2 12” pieces. He used his electric sander and sanded the long pieces into points on one end and sanded both ends of the 2 12” pieces. The shorter ones I planned to use as my cable needle. I found that just using my fingers was much easier.

He attached the little wooden pots to the ends of the 2 longer pieces with screws and “voila” my long size 50 knitting needles were born! I painted the ends and put a coat of clear glaze on to dress them up a bit. Not bad for about $6 for the set + 2 cable needles to boot. So, I saved $48.00! These were the ones I found on Etsy.
This is my result in progress using these size 50's.

For the "Lost in Love" I'm going to need larger needles. The pattern suggested these. But $92.00! Nah, I think I can make my own. A lady on YouTube had made her own, so off I sent my hubby to purchase 1.5" PVC pipe. Here's another lady knitting with huge PVC pipe.
MY PVC PIPE KNITTING NEEDLES:

Now I used 1.5" PVC pipe. However, the outside diameter is really about 1.75". I'm going to see if they work with my pattern and if not I'll just make me a set using 1 1/4" PVC pipe which should be about 1.5" diameter on the outside. Honestly, I think these will be fine. I just wanted you to be aware of the size if you decide to make your own.


I used a Wisk detergent cap for the ends. So my yarn won't slide off. These fit perfectly.

I just slid them on and tapped the ends on the floor. Perfect!

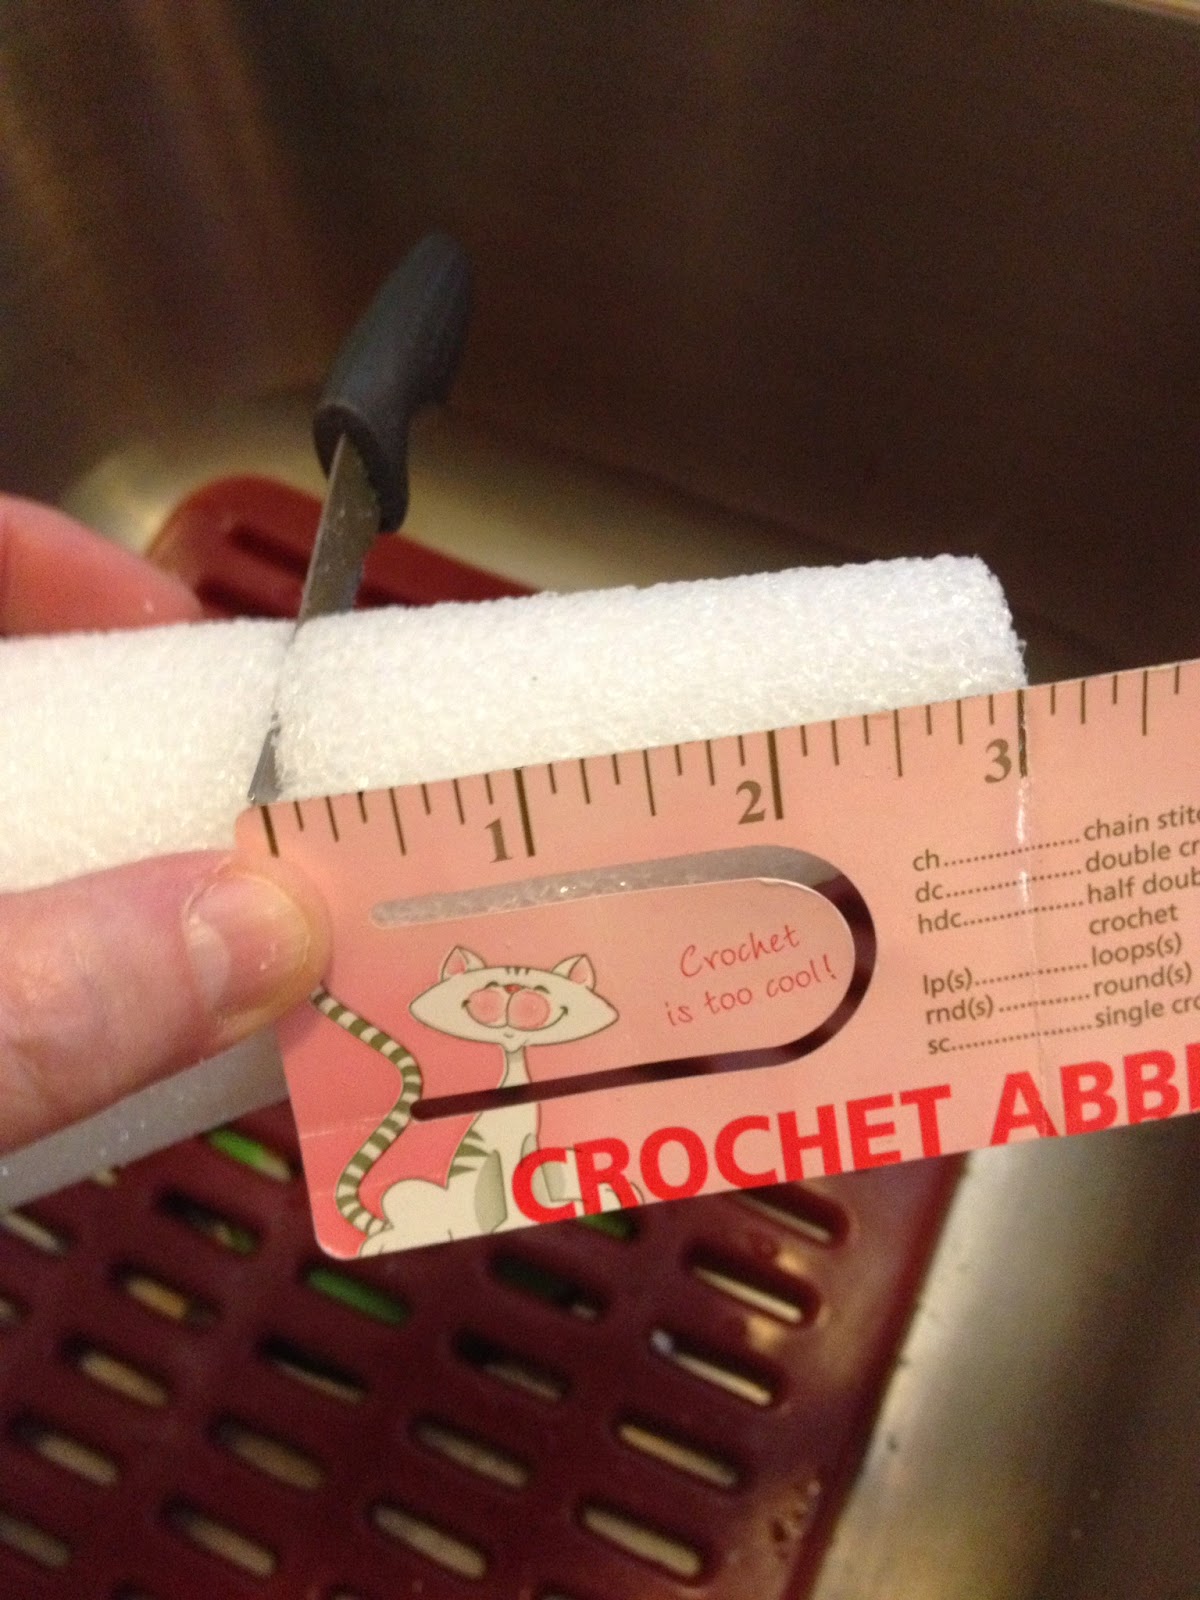
For the tips I used 2 Styrofoam cones.
I cut 3" from the top with a serrated knife. Just cut as deep as the knife. Not all the way through.

Now, cut about 3/4" of an inch below that all the way through. I then cut little sections vertical about every 1/2" around and then chiseled that out to look like this.

Both are the same it's just I already had a green one and it's going to be covered up anyway. So, just get whatever color they have.
Next I just carefully sliced away a bit more of the top to be more pointed.

Then I slid that end into my PVC pipe. I felt like that gave it more stability and strength than just taping the top only on the ends.


Next I used painter's tape and taped around and around.
It's feeling very sturdy now! Then I used some white electrical tape which is very stretchy. I wrapped it around and around until I got to the tip.


At the tip I used one piece and cut little snips in it so it would lay smoother. After that I used short little pieces to make it a little more smooth. You can see the difference after the shorter pieces are added here.
Then I just wrapped one more time with the electrical tape from the top back down to the bottom.
That's it! The ends are much firmer and sturdier than you think they would be. I will let you know once I knit with them but I think they will be just fine!

Here they are in comparison to the smaller size 50 ones I had made using the 1" dowels. I hope I've given you inspiration to make your own huge knitting needles and delve into HUGE knitting. It's really a lot of fun and the result is awesome!
Oh and some have asked if it hurts to knit with these huge needles. Not so much. The hardest part is turning the throw for the next row as the throw gets heavier each row. I sit on the couch to knit and the weight of the knitting is resting on the couch. I'm just moving and working with the ends. Now for these bigger ones I may have to move to a chair with the ends resting on the floor. I'll have to get back to you on that. LOL
Happy HUGE knitting!
UPDATE!
So, I am almost ready to start my next BIG stitch throw and I knew that I needed to make another set of PVC pipe knitting needles in the size the pattern calls for. My husband picked up the right size pipe which is 1 1/4" pipe if you want 1 1/2" diameter needles. This pipe has the diameter printed on the outside of the pipe (photo below) but just remember that measurement refers to the inside diameter.

For these PVC pipe knitting needles I made the tips the exact same way as the larger ones except for the measurement. I measured around the outside diameter of my pipe which was 5 3/8". I then measured down my styrofoam cone where it was the same diameter. I cut into it just the depth of my serrated knife all around. NOT all the way through. Then I cut all the way through an inch below that. Then just follow the same directions above on how I finished those tips.
However, I did have to made the ends a bit different as the detergent bottle caps for these were too large.
What I did was use the very bottom part of my styrofoam cones. I cut off about an inch and then carefully cut out the center with a serrated knife. I kept checking to be sure it would slide on easily. Be sure not to make your hole too large. You don't want them to slide around too easily.

Next, I cut strips of the blue painters tape and wrapped in and out of the hole to completely cover that doughnut shape piece of styrofoam. Then I did the same thing with the white electrical tape. I then slid it on carefully, pushing it on just a tad to make it fit.

Because it's styrofoam it will give a little. After I slid it on I then pushed on the end cap for the pipe. These are also sold at the hardware store and only cost less than a couple of dollars each. The styrofoam doughnut piece stays put without any other taping or gluing. Just the right size to keep my stitches from sliding off! That's it! Pretty easy huh?


